 View : Live Demo
Download : bangku.txt
Size : 12 kb
Lihat template lainnya di Azzahrah Design.
 View : Live Demo
Download : ottoman.txt
Size : 12 kb
Lihat template lainnya di Azzahrah Design.
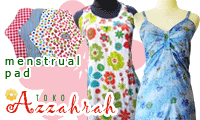
 View : Live Demo
Download : pregnancy.txt
Size : 12 kb
Info : My first Blogger XML Skins. This skin request by Nunu, my friend from Mesir. Hope you like this skin.
So sorry for being late :D
Lihat template lainnya di Azzahrah Design.
 Download : jendela-old.txt
Size : 12 kb
Info : Ada kesempatan tuk membuat skin sederhana. "Less is more", begitu pendapat seorang arsitek terkenal, Van De Rohe.
Skin ini masih dalam format blogger lama (Classic Skin), mudah-mudahan ada kelapangan waktu tuk ngutak-ngatik blogger versi baru ^_^

Sewaktu melakukan blogwalking, aku menemukan satu aksesoris blog yang bagus. Namanya Link Me Up. Link Me Up memberikan fasilitas penambahan link secara online dan bebas kepada pengunjung blog kita.
Cara pengaktifannya cukup mudah. Lakukan registrasi di : http://www.linkme-up.com/register.php
Selanjutnya, sign in dengan menggunakan account yang baru didaftarkan. Kita akan masuk ke dalam halaman linkManager. Klik link paling pertama dari barisan Get the linker HTML codes. Copy script yang ada lalu letakkan pada blog.
Selanjutnya, link dapat ditambahkan.
Daftar link :
Powered by : ![]()
Lihat tutorial lainnya di Azzahrah Design
Adakalanya ketika menginginkan sebuah avatar, ukuran gambar terlalu besar. Ukuran gambar harus diperkecil. Ada langkah mudah untuk memperkecil ukuran gambar. Dengan menggunakan sofware Avatar Sizer, pekerjaan dapat lebih mudah.
- Aktifkan program ini.
- Klik tombol 'Next'
- Pilihlan gambar yang ingin diperkecil.
- Tentukan ukuran gambar. Ukuran gambar yang disediakan nilai maksimumnya adalah 150x150 px.
- Tentukan tingkat kualitas gambar. Semakin tinggi kualitas gambar akan semakin besar ukuran byte-nya.
- Klik tombol 'Save'
- Tentukan nama file avatar baru dan lokasi penyimpanan.
- Done.
Download di sini
What is an Avatar?
An Avatar is a small image used in Forums, Mobile Phones, Instant Messenger programs (IMs), PDAs etc. to identify yourself or your contacts. In Forums Avatars are usually displayed to the left of your post, directly beneath your Username. In IMs, Mobile Phones, PDAs etc. Avatars are used to show your caller a graphical representation of who they are talking to and/or, as part of the phone book/address entry.
Why would I need an Avatar Sizer?
Avatars should be quite small, check your Forum or IM rules for the exact size. Usually Avatars should be no larger than 150x150 pixels in size and less than 36KB. If you don't already have an image editing program you need Avatar Sizer to resize your image to make it into an Avatar. The Avatar you create with Avatar Sizer can be any size from 1x1 pixels to 150x150 pixels.
Can any image be made into an Avatar?
In theory, Yes! Provided you have the rights to use the image and the image you have is one of the ones Avatar Sizer can handle, you can turn it into an Avatar. So, for example, if you've taken a picture with your digital camera or camera phone, you can turn it into an Avatar.
Read More | Donate and Download
Lihat tutorial lainnya di Azzahrah Design Read More......
Ada pertanyaan, "Bagaimana membuat link yang membuka halaman baru?"
Sebenarnya mudah, ikutin saja langkah-langkah di bawah ini:
1. ketik tag untuk link disertai link yang dituju
<a href="http://www.itbestcompu.com"></a>
2. ketik kata / kalimat yang ingin ditampilkan dalam web, misalnya: Our sponsor
<a href="http://www.itbestcompu.com">Our sponsor</a>
3. sisipkan target pada tag link
<a href="http://www.itbestcompu.com" target="_blank">Our sponsor</a>
DONE
Lihat tutorial lainnya di Azzahrah Design

Dari Nu’man bin Basyir, dia berkata,
“… Dan aku melihat semua laki-laki yang shalat saling mendekatkan antara pundak dengan pundak lainnya dan antara mata kaki dengan mata kaki lainnya.”
[HR Imam Bukhari]
***
Dari Abu Mas’ud al-Anshari berkata,
“Rasulullah shalallahu ‘alaihi wa sallam pernah menyentuh pundak-pundak kami dalam shalat seraya berkata, “Samakanlah dan janganlah kalian berselisih maka akan berselisih pula hati-hati kalian’.”
[HR Imam Muslim]
***
Prior to CSS, nearly all of the presentational attributes of HTML documents were contained within the HTML markup; all font colors, background styles, element alignments, borders and sizes had to be explicitly described, often repeatedly, within the HTML. CSS allows authors to move much of that information to a separate stylesheet resulting in considerably simpler HTML markup.
Headings (h1 elements), sub-headings (h2), sub-sub-headings (h3) etc. are defined structurally using HTML. In print and on the screen, choice of font, size, color and emphasis for these elements is presentational.
Prior to CSS, document authors who wanted to assign such typographic characteristics to, say, all h2 headings had to use the HTML font and other presentational elements for each occurrence of that heading type. The additional presentational markup in the HTML made documents more complex, and generally more difficult to maintain. To render all h2 tags in this manner, the markup had to be repeated for each heading. In CSS, presentation is separated from structure. In print, CSS can define color, font, text alignment, size, borders, spacing, layout and many other typographic characteristics. It can do so independently for on-screen and printed views. CSS also defines non-visual styles such as the speed and emphasis with which text is read out by aural text readers. The W3C now considers the advantages of CSS for defining all aspects of the presentation of HTML pages to be superior to other methods. It has therefore deprecated the use of all the original presentational HTML markup.
Lihat tutorial lainnya di Azzahrah Design
In web development, Cascading Style Sheets (CSS) is a stylesheet language used to describe the presentation of a document written in a markup language. Its most common application is to style web pages written in HTML and XHTML, but the language can be applied to any kind of XML document, including SVG and XUL.
CSS is used by both the authors and readers of web pages to define colors, fonts, layout, and other aspects of document presentation. It is designed primarily to enable the separation of document content (written in HTML or a similar markup language) from document presentation (written in CSS). This separation can improve content accessibility, provide more flexibility and control in the specification of presentational characteristics, and reduce complexity and repetition in the structural content. CSS can also allow the same markup page to be presented in different styles for different rendering methods, such as on-screen, in print, by voice (when read out by a speech-based browser or screen reader) and on Braille-based, tactile devices. CSS specifies a priority scheme to determine which style rules apply if more than one rule matches against a particular element. In this so-called cascade, priorities or weights are calculated and assigned to rules, so that the results are predictable.
The CSS specifications are maintained by the World Wide Web Consortium (W3C). Internet media type (MIME type) text/css is registered for use with CSS by RFC 2318 (March 1998).
Lihat tutorial lainnya di Azzahrah Design
Salah satu cara membuat 3 kolom adalah menggunakan tabel dengan 3 kolom. Adapun coding dasarnya adalah:
<table width="100%" border="0" cellspacing="0"
cellpadding="0">
<tr>
<td>Kolom kiri atas</td>
<td>Kolom tengah atas</td>
<td>Kolom kanan atas</td>
</tr>
<tr>
<td>Kolom kiri bawah</td>
<td>Kolom tengah bawah</td>
<td>Kolom kanan bawah</td>
</tr>
</table>
<table width="100%" border="0" cellspacing="0"
cellpadding="0">
width="100%"
Gunakan ukuran 100% bila ingin membuat tabel memenuhi 1 layar. Atau masukkan angka 770px untuk ukuran kecil.
border="0"
Ukuran border. Jika tidak ingin border terlihat, maka tulislah angka 0. Jika ingin menggunakan border, isilah dengan angka. Lalu, tetapkan warna boder, misalnya bordercolor="#000000" (hitam).
cellspacing="0" cellpadding="0"
Jarak antara kolom, baris, dan tulisan. Jika tidak ingin ada jarak, tetaplah gunakan angka 0 dan isi dengan angka lain bila menginginkan jarak. Idealnya adalah gunakan angka 2 untuk cellpadding.
<td>Kolom kiri atas</td>
Merupakan kolom di bagian kiri barisan atas. Tetapkan ukurannya dengan memasukkan tag width. Boleh menggunakan satuan % (25%) atau menggunakan satuan px (150px). Jika ingin menggunakan background, tambahkan tag background untuk file gambar dan bgcolor untuk warna saja.
<td>Kolom tengah atas</td>
Merupakan kolom bagian tengah barisan atas. Tetapkan ukurannya dengan memasukkan tag width. Boleh menggunakan satuan % (50%) atau menggunakan satuan px (470px). Sama seperti kolom kiri, dapat menggunakan variasi background.
<td>Kolom kanan atas</td>
Merupakan kolom di bagian kanan barisan atas. Tetapkan ukurannya dengan memasukkan tag width. Boleh menggunakan satuan % (25%) atau menggunakan satuan px (150px). Sama seperti kolom kiri, dapat menggunakan variasi background.
Perhatikan bahwa komulatif semua width (kiri, tengah, dan atas) harus sama dengan ukuran table.
Selanjutnya adalah baris berikutnya dengan coding:
<tr>
<td>Kolom kiri bawah</td>
<td>Kolom tengah bawah</td>
<td>Kolom kanan bawah</td>
</tr>
Bila ingin menambahkan baris, gunakanlah coding seperti di atas.
Hasil coding tabel 3 kolom (dan 2 baris) kita menjadi:
<table width="100%" border="0" cellspacing="0" cellpadding="0">
<tr>
<td width="25%">Kolom kiri atas</td>
<td width="50%">Kolom tengah atas</td>
<td width="25%">Kolom kanan atas</td>
</tr>
<tr>
<td>Kolom kiri bawah</td>
<td>Kolom tengah bawah</td>
<td>Kolom kanan bawah</td>
</tr>
</table>
Atau lihat contoh ini:
Perilaku Seindah Az-Zahrah - coretan harian seorang muslimah - | ||
| Link 1 Link 2 |
| |
Dengan coding :
<table width="400px" border="1" cellpadding="3" cellspacing="0" bordercolor="#E2BBD7">
<tr bgcolor="#E2BBD7">
<td height="70px" colspan="3"><div align="center"><font
color="#813D6E"><strong>Perilaku Seindah Az-Zahrah<br>-
coretan harian seorang muslimah -</strong></font></div></td>
</tr>
<tr>
<td width="25%" valign="top" bgcolor="#EFCAE4">
<a href="#">Link 1</a><br>
<a href="#">Link 2</a> <br>
</td>
<td width="50%" valign="top" bgcolor="#FDF3FA">
<p> </p></td>
<td width="25%" valign="top" bgcolor="#EFCAE4"> </td>
</tr>
</table>
selamat mencoba....
Lihat tutorial lainnya di Azzahrah Design Read More......
Subscribe to:
Posts (Atom)